Friday, September 30, 2011

LAST DAY TO ENTER The Hairy Peach BIG GIVEAWAY !!!

4 fabulous prizes will be giveaway on The Hairy Peach blogsite.  All are amazing and September 30th is the last day and final day to enter.  If you haven't entered then please Run, don't walk, over to The Hairy Peach and enter - tomorrow will be too late. 

click on any of the highlited links or copy and paste :
http://thehairypeachblog.blogspot.com/2011/09/birthday-celebration.html      
in your browser.

Wednesday, September 28, 2011

An Extracting Problem

Today is going to be one of those days when I get very little accomplished.  John had to have a molar extracted as it had fractured and there was no way to save it.  Having a tooth extracted is not easy at any age but seems to affect us more adversely as we get older.  John's been trying to deal with the pain and has been taking a mild pain killer plus antibiotics ... which unfortunately makes him feel dizzy and nauseous.  So given the fact that for a couple of days his diet is supposed to be restricted to soft foods this means a constant preparation of small meals ... oatmeal ... scrambled eggs ... cream of chicken soup ... mashed potatoes ... cream of tomato soup ... soup ... soup and more soup !  None of it is very filling and my hubby has always had a hearty appetite that required stick to the rib meals.
So this project that I'm working on and trying to figure out how to bring it all together has been put on the back burner ... for now.

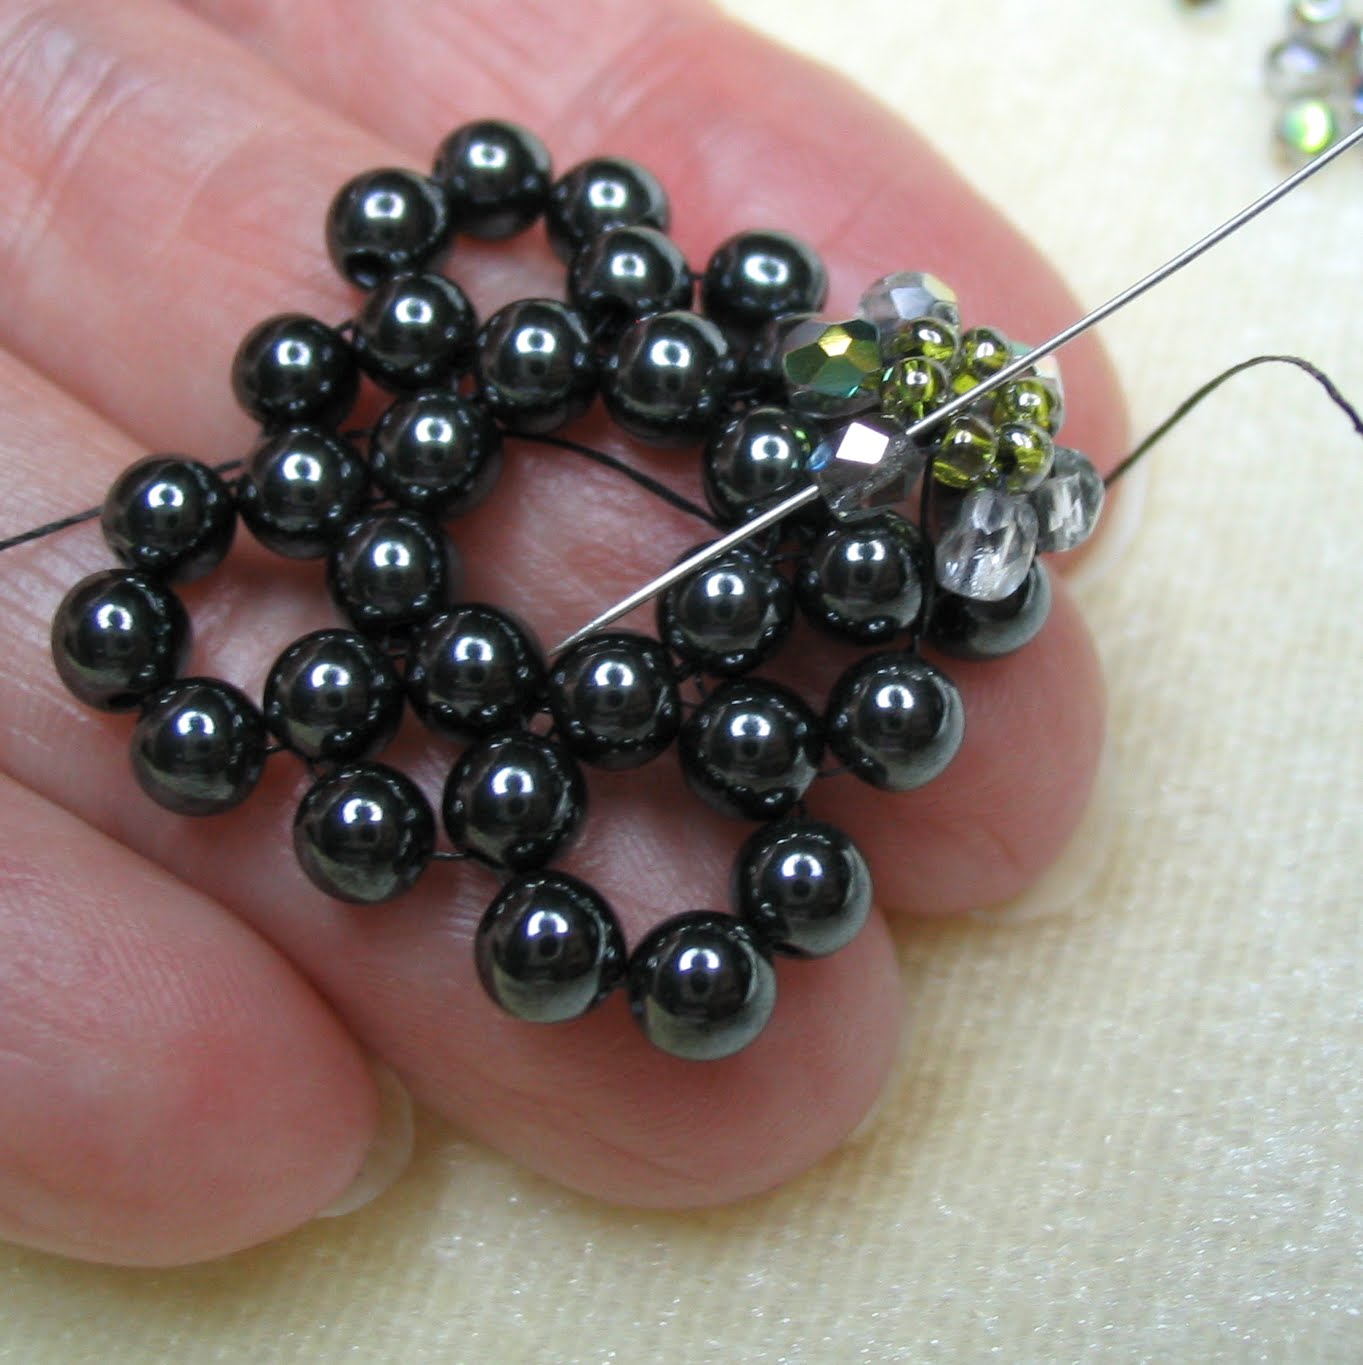
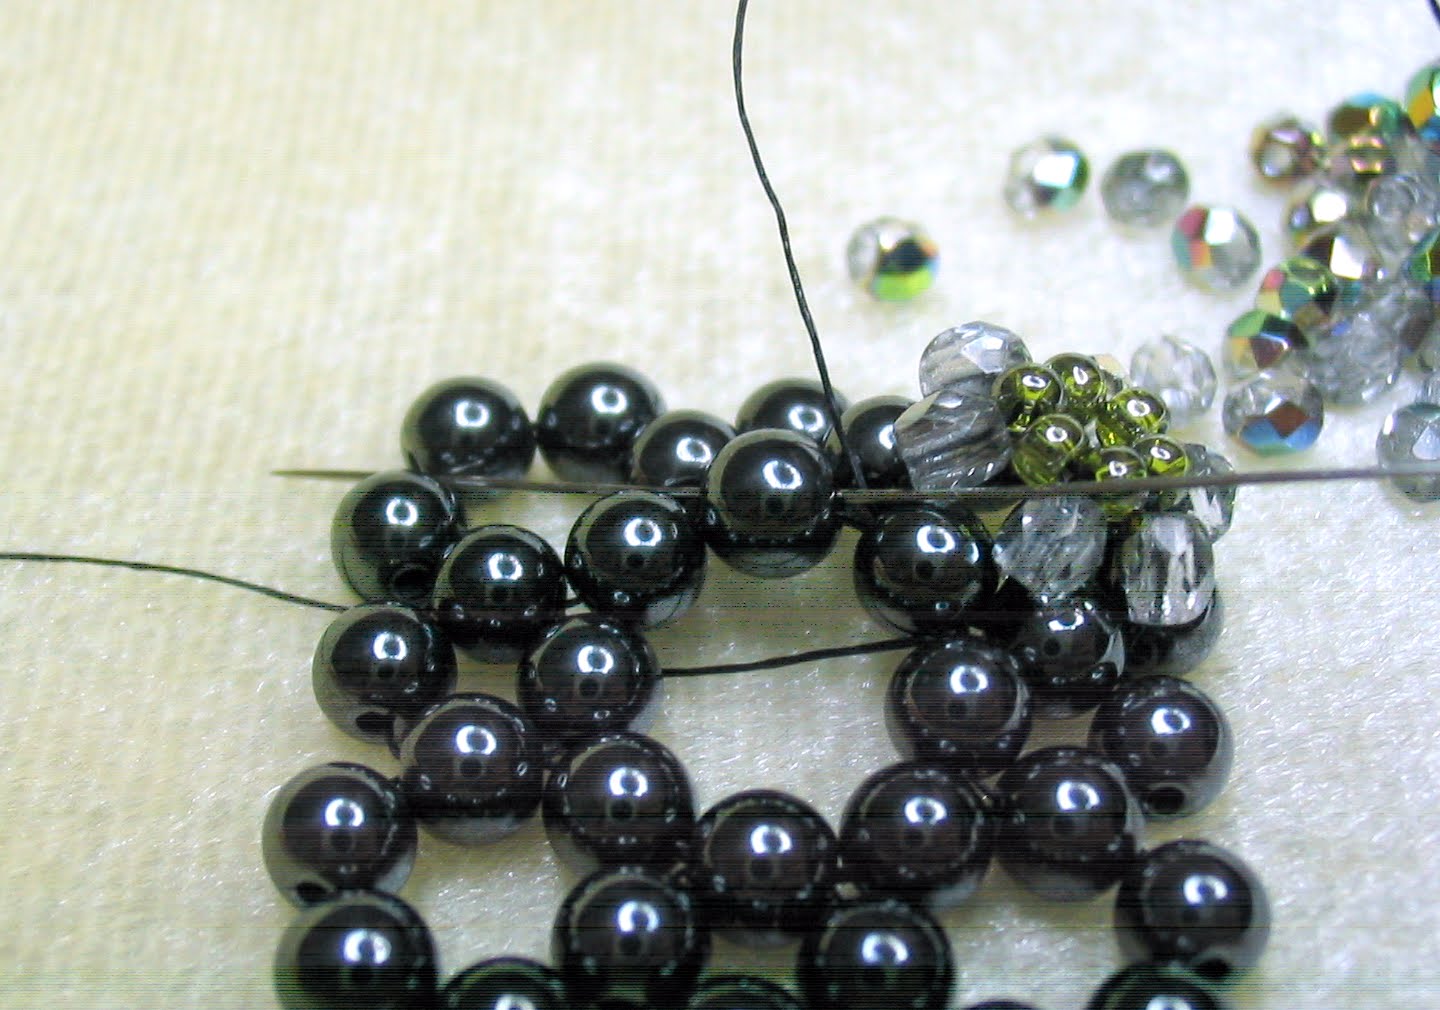
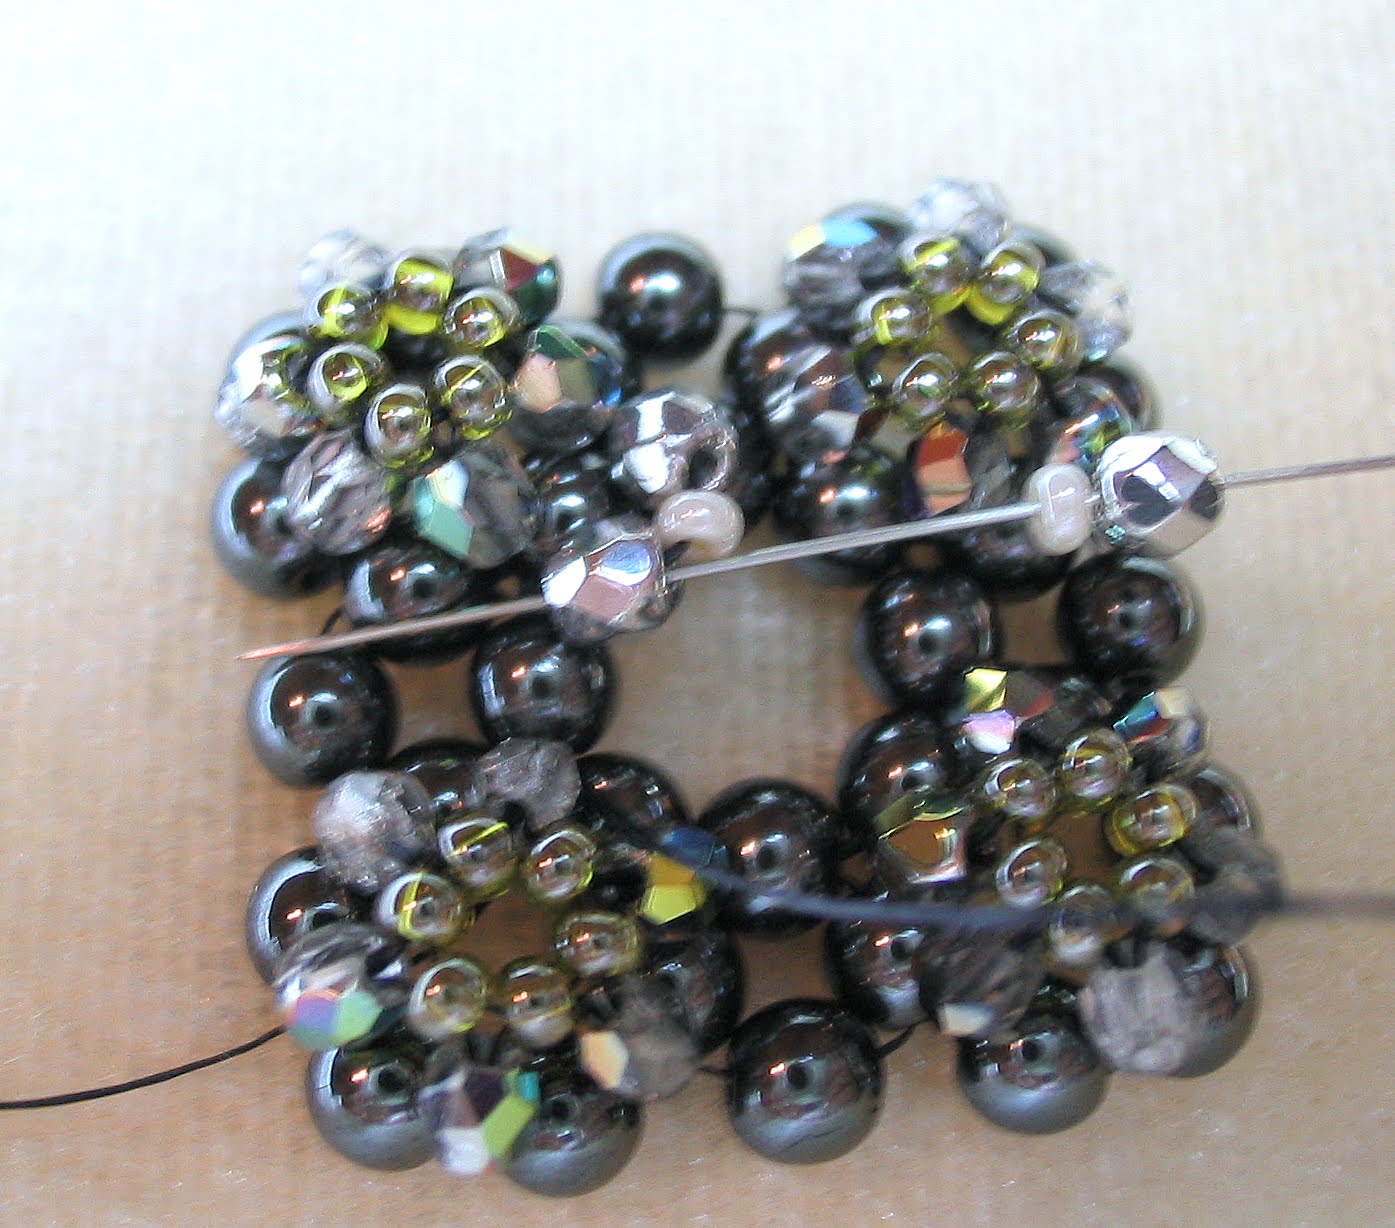
Photos above and below ... I call them Starflowers, they're a beaded flower and it took me a while to figure out how I could use them. I had already fabricated the beaded spiral rope (which is a pattern I love to make) and I wanted to make a second strand to compliment it but wanted something very different.  The Starflower came to mind and after some manipulation I figured out how to connect three of them for a focal point 

Photo above and below ... The one wonderful thing about these Starflowers is that they are reversible, if you use different beads for the backside.  I think it should be a nice contrast and yet still compliment the basic spiral rope. 


Now I just need some time to figure out what I wish to do about the necklace sides for the Starflower strand.  I think I would like it to be a little smaller (thinner) than the spiral rope.  Hopefully I will be able to work on it more tomorrow, if John is feeling better. 

Most of us know that when it comes to opinions and suggestions regarding jewelry designs, husbands are NO help at all,  at least mine isn't.  I show him a piece that I just made and he gets this blank expression on his face like he's thinking; "What am I supposed to do with that?"   Then he usually says something like; "That's nice dear."
So if you have any suggestions regarding the sides of the Starflower necklace I would love to hear them as right now I am so undecided that I feel confused.

Tuesday, September 27, 2011

Just Beading Around

What have I been up to?  Well I must admit it certainly hasn't been blogging. Since opening my 2nd etsy shop I've spent lots of time trying to promote it and also trying to stock it , which means beading and creating.  So here are few of the items I've created and I still have more yet to photo (let's not even think about writing up descriptions for etsy's listings ... ugh!)
Above ... Long beaded spiral rope necklace with a side of hand linked chains.
Above ... back of long necklace,  showing the vintage Czech glass Ivy leaf button that I used for a button clasp.
Above ... close up of a beaded bead, can you imagine that it takes over 100 beads to create this one beaded bead?  Thought the bead caps looked cute on it.
Above ... close up of one of the genuine yellow quartz beads.  It is incredibly faceted (impossible to see that in the photo) and is gem quality yellow quartz (my check book can vouch for that as it took a chunk of money to purchase a strand of them!)
Above ... I like the fact that it can be worn multiple ways and even doubled to look like 2 strands.
Above ... another, but different combo of beaded rope with chains.  This one is a multi-strand necklace.
Above ... love the colors of the russet red with the topaz aurora borealis
 beads, and the combination of gold and brass chains.
Above ... October is Breast Cancer Awareness month and in honor of this I used a very special rose quartz and sterling silver pendant that features the awareness ribbon.
Above ... I fashioned the necklace out of Delica 11/0 Jet Black, hex-cut seed beads.  Made it a triple strand using AccuFlex 49 strand cable, sterling silver crimp beads, sterling crimp bead covers, sterling jumprings and sterling silver heart shaped clasp.
Above ... close up of clasp ... it is solid sterling, not hollow, not concave on one side.  It is one lovely little clasp. I used tiny 3mm Czech glass faceted beads on both sides of clasp as I didn't have any rose quartz beads that were small enough (I wanted the necklace to be easily removable so that pendant could be worn on different chains, cords, ribbons etc. so the beads had to be small enough to slip through the bail opening).
Above ... this side photo gives you an idea of the how thick the sterling is on the bail and the ribbon decoration that cradles the rose quartz heart.  It's substantial and would take a lot of force to bend that chunk of sterling.
Above ... Since I contributed my first pair of beaded cube earrings (lovingly called Monte Carlo) to a giveaway in hopes of attracting some traffic to my new shop, I decided to make another pair.  These are in aqua blue and silver.  Earring wires are sterling silver and handcrafted by me.
Above ... trying to create two identical wire teardrop hoops was the hardest part of making these earrings.
Above ... And they are nice and long and flirty and swingy, which I adore.
Above ... close up of beaded cube beads.

Plus I have a necklace and 2 pairs of earrings yet to photo ... and then there's that dreaded description to write up on each and every one of them.  So that's what I've been up to (in between doing laundry, cooking, cleaning house etc.).  How about you?  Any new products that you've made?  Trips that you've taken?  Songs that you've sang ? :)

Saturday, September 24, 2011

And The Winner Is ....

These earrings are an adorable pair of beaded cube beads that swing from golden teardrop shaped hoops (which are handmade by me). They fall from 14 karat gold filled ear wires that I've embellished with peridot green Swarovski Crystals. These really are so much prettier in person.
Sara, of the blog Red Pine Mountain, has graciously hosted a giveaway for my new etsy shop this past week.  Today she has drawn a winning name for the Monte Carlo earrings. 

A random number generator at random.org  was used to choose the winning number and that number belongs to Rick Kratzke ...  Congratulations Rick.   Rick says these will make a nice Christmas gift for his wife.  Indeed they will.

I wish to thank each and everyone that took the time to visit Sara's blog "Red Pine Mountain" and enter the giveaway  ... but most of all I wish to thank Sara for giving of her time to do this for me.
I'm not sure where she hides them but she must have a pair of gorgeous wings as she is truly an angel.

Wishing you all a lovely week-end.  :)

Tuesday, September 13, 2011

Pigs in a Pen


Not in a million years did I think my fashionista daughter, Kathi, would become a country bumpkin.  Odd how people can and do change.   Kathi, her husband and children have sown a garden for a couple of years now; their menagerie of animals have grown from the standard dogs, cats and guinea pigs to include horses, rabbits and chickens.  And now their youngest daughter, Haley, has joined the local 4 H club, her project is to raise an animal for next local fair.  Her animal is a nice pink, porky pig. 
photo above...Haley's pig, trying to burrow under the lush, grassy weeds.

Haley is in a 4 H partnership with two other children, each has a pig, the pigs are being housed at Haley's as she has the space for them.  Of course the other two children must do their share of caring for, cleaning, and nurturing these future fair animals. 
photo above ... Haley in the shelter of the pig pen shade along with her charge of piggies.  At the moment they would be considered young pigs but should grow and actually triple their weight and size before the day of the fair ... in just 3 short months!

photo above ... It's hard to keep the 3 young pigs together.  Haley's pink pig wandered off to play in the deep grass and now the brown piggy is thinking about do the same.

photo above ... Ah alone at last.  The black and white piggy now enjoys the luxuary of the shade and the cool, moist soil without the other two.

No, never in a million years did I think I'd see the day that my daughter would have pigs in her back yard.

Sunday, September 11, 2011

In Respect and Memory

It's strange how we can share thoughts.  For years both John and I "thought" about getting a flag but neither one spoke the thought out loud.  It was just before Memorial Day that I mentioned to John how it would be nice to fly the flag on our national holidays and days of special recognition.  John had been having those same thoughts.  Unfortunately our local home improvement centers were all out of the flag kits which included mounting brackets but they assured us they would be getting more in.

This past week John was able to purchase the flag kit he had wanted and it is now attached to the front of our humble home. Old Glory will wave proudly on this 11th day of Sept. 2011 in honor of all our heroes of 9-11-2001 , their memory will be eternal (which is more than I can say for the terrorist who, filled with such vile hatred, slaughtered so many beautiful and innocent souls).

Long may Freedom Reign ... Long may Justice and Liberty stand.
God bless us all!

Saturday, September 10, 2011

Ballerina Girl, You are so Lovely ...


Lately I've been AWOL and I truly apologize.  Once there was a time that I could multi-task without batting an eye, now I can't bat an eye and chew gum at the same time.

As you know I've been a little busy trying to get my new etsy shop DellaMessina in order and up and running.  I've decided I could really use a clone to either take the photos and do the descriptions and listings  OR clean the house and cook while I take care of business ... guess if I were smart I'd ask for 2 clones to all my grunt work so that I could be free to create my passions, to blog and to visit all my favorite bloggers. :)

Today I listed some little earrings that were inspired by a favorite Lionel Richie song ... "Ballerina Girl"
Ballerina Girl
You are so lovely
With you standing there
I'm so aware
Of how much I care for you

You are more than now
You are for always
I can see in you
My dreams come true
Don't you ever go away
You make me feel like
There's nothing I can't do
And when I hold you
I only want to say
I love you

Ballerina Girl

The joy you bring me
Every day and night
Holding you tight
How I've waited for your love
 

Sometimes I've wondered
If you'd ever come my way
Now that I've finally found you
This is where my heart will stay

I'm never gonna break your heart
Never will we drift apart
'Cause all I wanna do
Is share my whole life with you

'Cause you make me feel like
There's nothing I can't do
I guess I finally realized
There's nothing else like loving you

Ballerina Girl
You are so lovely
I can see in you
My dreams come true
Don't you ever go away
Ballerina Girl...
Photo above ... I have always wanted to be able to display my jewelry on a model, but some people have objections to earrings being worn before they get them.  Since I can not afford (at this time) to purchase a fancy head mannequin with pierced ears I had to be creative.  I found a clip art of a nondescript female profile ... the ear is the most important part of the photo.  I had to enlarge the clip art to 200% to get it to human size.  Once enlarged I printed it and pasted it onto a sheet of card stock and then carefully pierced the paper ear.  She was so stoic, didn't even flinch !  I was quite please with how it turned out, in fact it looked so realistic I ended up cropping my photos to show that it was not a real human and even put a disclaimer in my descriptions.

Sunday, September 4, 2011

Right or Wrong ... No Second Guessing It Now

Right or wrong, for better or worse; I did it !  I opened a second etsy shop where I, hopefully, can sell my jewelry creations.  It's rather lonely at the moment ... no hearts, very little views.  I'm trying to build up some of the connections that my old shop had but it takes time.  I'd appreciate any and all of your help to get me going and create a shop that looks visited and loved. :) http://www.etsy.com/shop/DellaMessina

Photo above ... The first piece listed in my shop is this pendant. After designing the color scheme for my sister's necklace I loved it so much I created a replica. The tones of gray and silver and iridescent green give this piece an antique feel. It's called Corsica, after the  gorgeous Mediterranean island of Corsica.


Photo above  shows the face of the Corsican pendant and
the photo below shows my handcrafted sterling wire hook clasp ... the tiny pewter seashell charm goes well with the Mediterranean theme.

After creating the pendant I felt more adventurous and tackled making it into a bracelet. With its substantial feel and regal appearance I call her Contessa.

Thursday, September 1, 2011

Toadstools and Owl Eyes

Photo above ... We've had a bit of rain and these little toadstools have been popping up all over the yard.  I like the arrangement of these 3 as they appear to be in ascending order.

For the past few days I've been preoccupied with setting up a second etsy shop.  It still has a few things that need to be finished off before I take it from vacation mode to "open for business" and though I would have loved to have opened it up on the 1st day of Sept., it looks like that isn't going to happen.

If any of you have more than one shop and use Paypal I'd love to hear your advice and or suggestions.  I'm wondering if I'll need to toggle back and forth from my two email addresses in order to view orders from a 2nd shop and the Paypay confirmation, that is set up with the email account of my 1st shop ... I know, I said "orders" hopefully this won't just be wishful thinking,  I do have my fingers crossed that there will be orders and lots of them.  :)
Another view of toadstool steps. These are pretty good size, about 4 to 6 inches across.

 I have an ophthalmologist appointment this afternoon so I'm sure I won't be getting a lot done as my eyes will be dilated, I'll look like an owl and most light, even the PC monitor, will be painfully too bright for several hours.  So, for now, I wish each one of you, all of my dearest and best wishes.
And then there was this one ... the outsider.  With its fringed edges it is about as big as it will get and was close to 6 inches across.  At certain times of the year our yard sprouts Fairy Rings, large circles of mushroom/toadstools.   Some say that the rings are formed by fairies and these tiny fantasy creatures gather around to socialize, using the toadstools as their chairs, other say the rings are caused by the fairies dancing around in a circle and where they've danced the mushroom magically grow.  I haven't seen any Fairy Rings this rainy season so perhaps the fairies are holding their get-togethers elsewhere.

Friday, August 26, 2011

Sicily - Island in the Sun

Photo above ... Aboard the train ferry, crossing the Strait of Messina (circa 1985).

Once upon a time long, long ago a little girl was born in a land of warm yellow sunshine, Mediterranean breezes, lush groves of citrus trees,  olive orchards and grape vines.  She was a fair child with dancing blue eyes and blond hair that curled like Shirley Temple's famous locks and, surrounded by her grandparents and the doting attentions of her 4 aunts, she was undoubtedly spoiled.   I was that little girl and the place was Messina, popular sea port and capital of Sicily, the large island just off the toe of the Italian mainland.  As I grew up my blue eyes turned a gray-green and my hair darken to brown.  Oh well we can't all be blue-eyed blonds.

I'm considering using this photo as my new avatar.  Even though it's very old and I no longer look like this fresh faced 40 year old, the photo holds a lot of lovely, warm memories of my first and only trip back to the land of my birth. Please let me know if you think it is a bad idea to use an ancient photo or not.

Why my mother, Antonietta,  didn't stay on that idyllic island is a long story and I probably don't really know the true reason she left.  Perhaps, as she claimed,  she wanted to join my father in the United States, even though he had met another woman and he, along with his adulteress, were hounding her to grant him a divorce.  Or maybe Antonietta  just wanted to get away from her parents, whom she felt had forsaken her, or from her younger sister, Rosa, who had betrayed her.  Perhaps she wanted to be someplace where she would never look upon the face of Nino, her ex-fiancee who had broken her heart.   Several years earlier she and Nino had been engaged but then he fell in love with and wanted to marry her younger sister Rosa.  Perhaps that's the reason Antonietta, jumped into a marriage with a dashing young, foriegn soldier from the United States of America ... unfortunately it would be just another heart breaking relationship.  Gives meaning to the explanation; "It's complicated", doesn't it ?

Together my mother and I left Europe and crossed the vast Atlantic Ocean by steamship.  I was only 2 at the time.  During all the years that passed I've only visited the land of my birth once.

July was not a good time to visit Italy, the summer was gruellingly hot and humid.  Air conditioning, back in 1985 , was limited, many did not have it and most cars were not equipped with it.  Our Roman hotel promptly turned off the central AC at 10 P.M.  It was a cost saving and energy saving gesture.  However once the unit was shut off  guests abruptly awoke to a stifling hot, and stuffy room.  I recalled having to open the window for ventilation.  There was a wedding reception going on in the gardens below and the singer began to sing Stevie Wonder's; "I just called to say I love you".  Considering the circumstances it was and is still a pleasant memory.

We did the typical tourist jaunts around Rome and then boarded a train to Sicily.  Upon reaching the toe of the mainland we disembarked the train while it was put aboard a ferry ... yes passengers, train and all went via ferry to the Port of Messina.  There was also a surprise awaiting us as we boarded the ferry, my Sicilian family was there to greet us.   Naturally my mother chatted away in fluent Italian while John and I wondered; "Who ARE these people?" 
My mother, at times, tended to be oblivious of such small matters such as the fact that she never taught me to speak the language.  Matter of fact she made a point that Italian would not be spoken in her home ... unless she was on the phone speaking to her parents or sisters via transatlantic telephone (that was before the days of satellites and man had not gone into space, let alone walked on the surface of the Moon). 
Truthfully I am resentful that she deprived me of this heritage but what's done is done. 
On the Ferry from Villa San Giovanni, Italy across the Strait of Messina to Messina, Sicily. The 3 boys in front are my cousins. My mother is the lady holding a camera (uses film - not digital), my uncle Franco stands beside her with his hand on her shoulder. I am behind and next to my mother (with the short, dark brown hair) and directly behind me is my uncle Pippo

Saturday, August 20, 2011

Porcelain Pendant - PART II Embellishing

PORCELAIN PENDANT PART II -  EMBELLISHING
This is how we left the foundation of our pendant.  The working thread is exiting from Bead #11 and if we were to continue bringing the thread up to the top bead we would end up working  clockwise, which is difficult for me and most right handed people to do.  So at this point I flip my work over so that I'm working counter clockwise.

Bring your needle up through the side beads of the last 6 bead circle finished, and exit through the left side of its very top bead.

Pick up 1 of the 3mm crystals, 1 seed bead and 1 crystal.

Pass needle back through the top 4mm round bead.


Travel down through the next 4mm bead to your left.

Pick up 1 crystal and 1 seed bead.

Now pass needle through the 3 mm crystal bead to your right ... remember to go through just the crystal and NOT the seed bead.
 

Pass needle back through the same 4 mm bead that you just added the new crystal and seed bead to.  Again remember we are traveling in a counterclockwise direction.

Basically we will be adding 1 crystal 3 mm bead and 1 seed bead between each of the 4 mm beads in this circle.  Pass needle through the next 4 mm bead.

Again pick up 1 crystal 3 mm bead and 1 seed bead and pass needle down through just the crystal bead added previously.

And then back through the 4 mm bead that is at the base of the newly added crystal.

We will continue with this pattern of going through the 4 mm base bead, picking up 1 crystal 3 mm bead and 1 seed bead  all around the 6 bead circle until we have 6 crystals and 5 seed beads in place.

Photo below shows the 6th crystal and its seed bead being set into position by going through the crystal to its left.

Photo below shows the needle going through the base 4 mm bead a second time.  I should have designated the tip of needle in this photo but trust me, it is to the right,  traveling in the accepted counterclockwise direction.
Photo below ... Notice there is a gap between the first crystal added and the very last one that we've just set into place ?  We are going to now fix that gap and add our 6th seed bead.

Bring needle up through that very first crystal  (the one to your right) and pick up 1 seed bead.

Bring needle down through the last crystal added, the one to your left

And back through the 4 mm base bead.

And up again through that very 1st crystal added.

Now we are going through each of the top 11/0 seed beads ... all 6 of them

Then back through what would have been the 5th seed bead  in this "crown"

Pass needle down through the crystal 3 mm bead right below the seed bead that you've just gone through.

We now journey over to the next medium sized circle of 6 beads over to our left by going through the 4 mm base bead from right to left ...

continue over to the next 4 mm base bead, this will be a bead in the large center circle

Now up through the right side bead of that 6 bead circle

And over through the next 2 beads, needle is going from right to left.
we are now in position to make another crystal and seed bead "crown" around the beads of this circle.

It is made just like the previous one by picking up 1 crystal 3mm bead, 1 seed bead and 1 crystal bead.  Going back through the top 4 mm bead and then

passing the needle through the 4 mm base bead to the left of the newly added crystal and  once again picking up 1 crystal bead and 1 seed bead  going back down the previous crystal and back through the 4 mm base bead.

Once 6 crystals have been added along with 5 seed beads there is that familiar gap between the first and the last crystal that needs to be joined.

Pass through the base bead

and up through the very first crystal that was strung on this circle

Pick up 1 seed bead and pass down through the last crystal that was strung

Back through the base bead , from left to right ...

Again up through that 1st crystal ...

We will again go through all of the top seed beads, joining them into a nice tight circle and forming our "crown".   Just like the first crown made we will travel back through the 5th top seed bead (the one to the left of the 6th seed bead bridge that was added last).

And then pass through the 4 mm base bead that is part of the large center circle.  Following the same path that we did to reach the 2nd 6 bead circle , we will travel over and up to the 3rd 6 bead circle to the top bead and repeat the same steps as we did to make our first 2 crowns.

Complete the crowns on the 3rd and 4th remaining 6 bead circles in the same way as you did the first two.
When 4th crown is complete, travel down the familiar 6th crystal and through the 4 mm base bead to position the thread for making the crown of the large center circle of beads.

Here you will pick up your contrasting 3mm crystals and seed beads (if this is what you've decided to use) .  Like before, pick up 1 crystal, 1 seed bead and 1 crystal and pass needle back through the 4mm base bead.

Pass through the 4 mm base bead to the left of the newly added crystals and, like the other crowns, pick up 1 crystal and 1 seed bead

Travel down through the crystal to your right, again just through the crystal bead and not the seed bead above it.

Pass again through the base 4 mm bead beneath the newly added crystal and then through the 4 mm base bead to the left of it. 

Continue with this pattern all around until you have 8 crystals and 7 seed beads in place.
Then just like the smaller crowns, pass through the 4 mm base bead

And up the very first crystal added

Pick up 1 seed bead and go down through the last crystal added

Back through the 4 mm base bead

And up through the first crystal (sorry about the fuzzy photo but I took 3 shots of this and believe me this is the only one that turned out the best ... scary isn't it ?)

Now back through all of the top seed beads, to join the top of the crown together.   I sometimes go through them twice to make sure they're secure.

Then back down through one of the crystal beads  ( these last few photos were all fuzzy and I haven't figured out if maybe I was getting tired at this point or if my camera was trying to tell me it had had enough and needed to rest) 


At this point the pendant is pretty much finished.  If the working thread is long enough I normally work it around until I get to a top bead in one of the 6 bead circles and then I use that thread to attach the pendant to my own seed beaded bails.  But you could use the thread to attach it to a large closed jumpring or to a metal pendant bail.  Once completed all thread tails should be worked securely back into the piece and then cleanly cut so they do not show.

Related Posts Plugin for WordPress, Blogger...