

While visiting Mandy's blog; Beads for Brains 365 , I ran across her completed Porcelain Pendant. She credited the creater and posted a link back to her blog; Kreatív vagyok .
The tutorial had lots of photos but being in Hungarian it made it difficult to figure out just what the photos were implying.
With perserverance I was able to figure out how to make this pendant, granted it may not be the exact same instructions as Kreatív vagyok but the out come is the same.My directions are designed for the beginner and I've gone into great detail ... in other words the more experienced and advanced beaders may find these directions redundant in many places. Please bear with me as I can remember all too clearly how frustrated I was as a newbie beader with instructions that assumed I already knew all the basics. :)
The List of Materials :
Your standard medium weight beading threads such as Nymo, Silamide, Fireline, etc. (I like to use 6 lb. Fireline for mine).
Thin beading needle
Sicissors
Thread conditioners or beeswax if you normally use it
BEADS:
32 Round 4mm beads
Size 3mm Firepolished crystal beads, 32 if you want them all in the same color or 24 of one color for the outer sections and 8 of a different color for the inner section, if you want a look similar to the one in my tutorial.
Size 11/0 round seed beads again you may use all one color or divide them like the firepolished beads.
Note - You may use Swarovski crystals for this pattern but it does create a slightly different look to the pendant as the 3 mm Swarovski bicones are not as long as the 3 mm Firepolished beads.
Basically the foundation of this pendant is created with right angle circles. The large center cirlce of 8 beads is surrounded by 4 medium and 4 smaller circles.
PENDANT FOUNDATION :
Cut a length of beading thread aproximately 2 to 3 yards long. Condition thread if you wish.
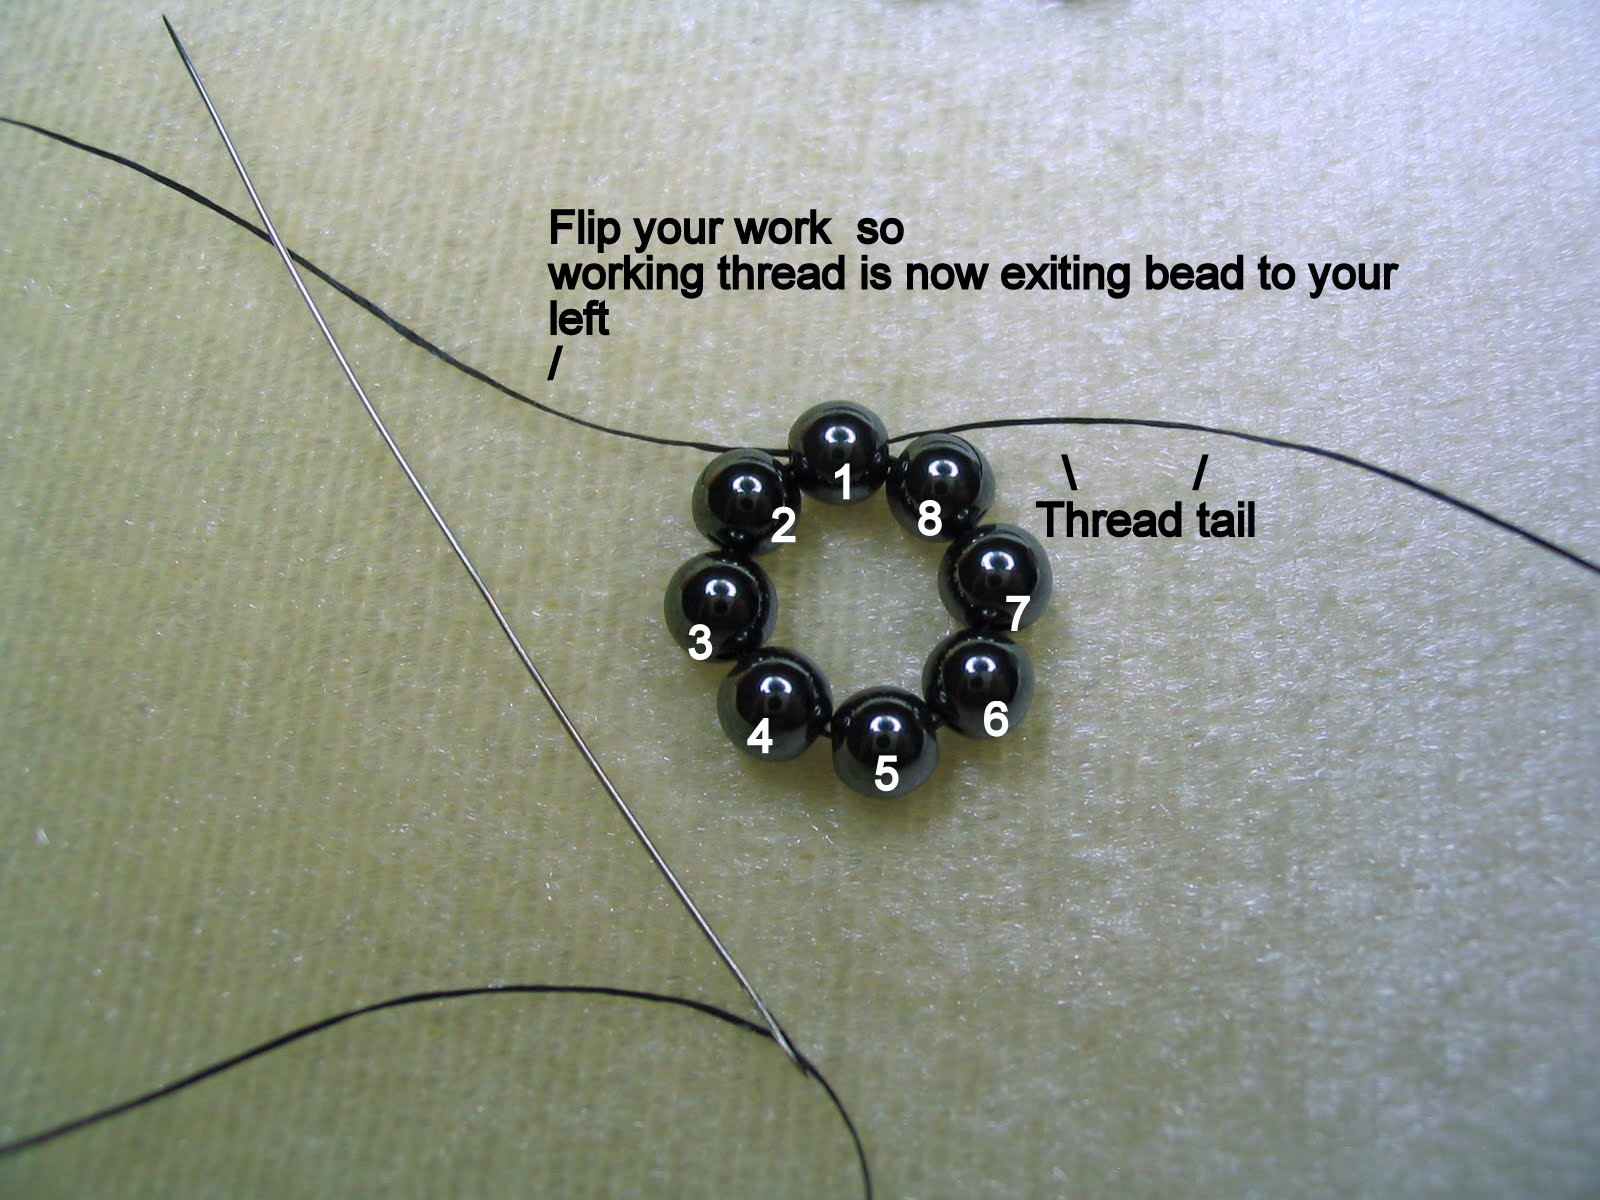
Pick up and string 8 beads leaving a tail of thread about 8 to 10 inches long.

Pass needle back through all 8 beads to create a circle.


The beads in my photos are numbered in the order they were strung. You will notice that your working thread is coming out of the 1st bead from left to right, I find this akward so at this point I flip my work.


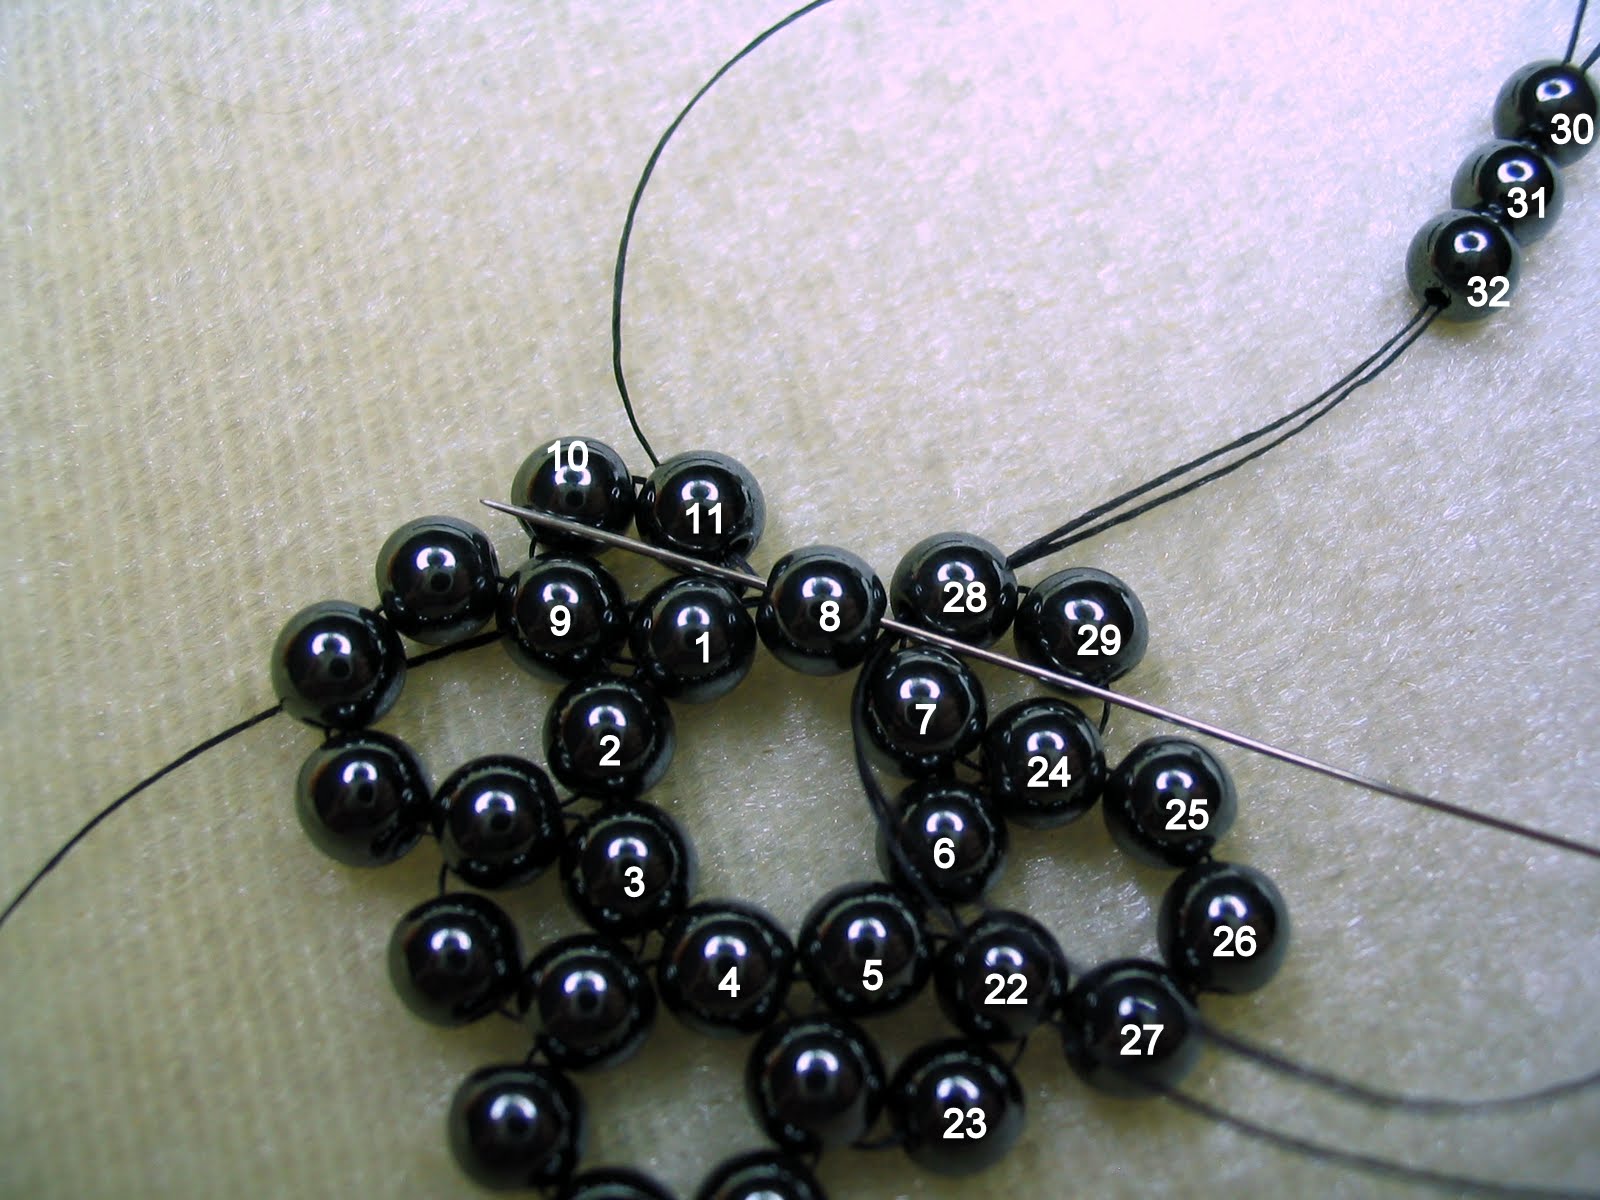
As you tighten the thread you'll notice that you've just created another circle, the first of the medium sized circles and that it has used beads in both the smaller and the large circle to make it a complete circle. Pass needle through the next bead in the large circle, bead # 3.

Pick up 2 of the 4mm beads and pass through the side bead, bead #12, in your newly formed circle.

Bring the needle over and through the next bead of the main large foundation circle, Bead # 3, and draw thread up tightly.

Another small circle has been completed.


Bring needle through the side bead of the newly formed small circle, Bead # 16 and then through Bead #4 in the large main circle. Pull thread tautely and another medium sized cirled is now completed.

We repeat this basic proceedure again, going through Bead # 5 in the main large circle.

Pick up 2 of the 4mm beads and pass through Beads # 18 and #5.


The 3rd small circle is now complete and like in previous steps we travel through the next bead of the large main circle, Bead #6.

Pick up 4 more of the 4mm beads and now pass needle through the side bead of small circle, Bead #22 and then through Bead #6 of main circle.


At this stage we are 75% through our foundation piece. The last small cirlce is made like those before, passing needle through Bead #7 of the main circle ...

picking up 2 of the 4mm beads and then going through the side bead, Bead #24, of medium circle and through Bead #7 of large circle.

To me it now resembles a heart shape. The last circle is going to be a little different as 3 beads of the circle of 6 are already in place ... these are beads # 8, 11 and 28.

So now you'll pass the needle through Bead #8 of the main circle and up through Bead #11 of the small circle made earlier.


I will post that very shortly as this post has already taken a lot of time to put together ... so excuse me while I take a bit of a breather. :)
PART 2 EMBELLISHMENT OF PENDANT IS NOW AVAILABLE - CLICK HERE
ps ... If you click on the photos you'll get a larger picture which may help if you're having trouble reading a bead number or trying to figure out where the thread is exiting from.


Wow, you seriously put a lot of work into making this tut for us. Thank you so much. Looking at your photos, it is very clear how to make the base, unlike me trying to figure out the other site. Looking forward to the rest of the pendant! :)
ReplyDeleteThank you Shirley. It really isn't a hard pendant to make but the Hungarian language barrier certainly complicated things. Also I think the blogger may be left-handed, as the photos seemed to be in reverse, which made it doubly hard to comprehend.
ReplyDeleteOh my...beautiful! I don't think I'd have the patience or the dexterity for this...great tutorial by the way!
ReplyDeleteAnna even the base is beautiful it renminds me of a mourning cross - I love this!!!
ReplyDeleteThank you for clear instructions, that are supported by good pictures.
ReplyDeleteSorry, my english is not good.
Leena from Finland